
Showing posts with label Decorate. Show all posts
Showing posts with label Decorate. Show all posts
Wednesday, October 17, 2012
Ocean Inspired Bathroom
Over here at Heather B design: http://www.heatherbdesign.com/2012/10/ocean-inspired-bathroom.html
Tuesday, October 16, 2012
My Bathroom Mood Board
Over here at Heather B design http://www.heatherbdesign.com/2012/10/my-bathroom-decorating-ideas.html
Tuesday, July 24, 2012
Grinch Green Walls
To the tune of My Way by Frank Sinatra:
♫ ♪ Regrets, I’ve had a few, this one is huge and so I’ll
mention it.
I painted, my wall bright green, and now it seems, like the
Grinch’s residence.
Inspired, by a chair, I thought I’d dare, to make a
statement
But now, I’ve done one wall, I see I haaaaate it. ♫ ♪
Yes, even the design-y-est among us can make some spectacular mistakes. I got the brilliant idea to paint my kitchen acid green. Why? Because I was on a bright-color kick and I thought it would be super-cool. Then I saw a picture of some chairs with beautiful bright-green upholstery and thought "That's it! That's the color." so I decided to find the color that matched and paint the walls.
Here's how that choice went:

I saw that chair and I loved it! Then I realized that I already had lots of items in the color that I loved.

And finally, I found a paint swatch that matched. What was the result of the green madness?
This:


These pictures really don't do this color justice. It cast an eerie green light all around the kitchen when the light hit it. At night it was nearly day-glo. In fact, if I had a black light, it might have turned out to be glow-in-the-dark. It was spectacular... in a "spectacularly bad" kind of way. The very, very kind lady at Lowes, who sold me the paint, also took it back and gave me a refund.
With it I bought a lighter, prettier green. It's kind of a honey-dew melon color. It's much better.

See? Pretty, huh?
The moral of the story is 1. choose your inspiration carefully, and 2. don't keep going with a bad choice, cut your losses and try again. If only the nice lady at Lowes could give me a refund for all of my bad decisions!
See you tomorrow!
H
Monday, June 25, 2012
Current Color Crush
I thought I'd drop in and show you what I'm currently thinking of for colors in the main living spaces in my house.
Right now I'm loving clear, bright colors from all the way around the color wheel. I've always had a hard time choosing a favorite color but several years ago I decided that favorites where limiting and therefore useless. Why would you want to pick a favorite song or color or ice cream? Seems silly when there are so many good options out there.
I love rooms and homes where the owner blends the entire rainbow successfully. It's true that it's easy to end up with a space that feels clownish when you're using the spectrum. If you look at these rooms, you'll notice that the colors aren't the exact primary/secondary colors on the wheel. They're not using blue, their using turquoise; they're not using green, they're using lime. This slight shift makes the palette more sophisticated and less like a box of crayons.
 |
| Photo from Bed of Flowers B & B |
Right now I'm loving clear, bright colors from all the way around the color wheel. I've always had a hard time choosing a favorite color but several years ago I decided that favorites where limiting and therefore useless. Why would you want to pick a favorite song or color or ice cream? Seems silly when there are so many good options out there.
 |
| Photo from House of Turquoise |
I love rooms and homes where the owner blends the entire rainbow successfully. It's true that it's easy to end up with a space that feels clownish when you're using the spectrum. If you look at these rooms, you'll notice that the colors aren't the exact primary/secondary colors on the wheel. They're not using blue, their using turquoise; they're not using green, they're using lime. This slight shift makes the palette more sophisticated and less like a box of crayons.
 |
| Photo Bed of Flowers B & B I LOVE this green. I'm thinking of using it on my kitchen walls, and this blue might grace my living room walls. |
One of the places that is extremely successful in the sophisticated use of bright colors is Bed of Flowers Bed and Breakfast in the Netherlands, three of whose images I've borrowed for this post. I just love everything about this house. If ever there existed a "Heather House" this is it. I could move right in.
 |
| Photo from Bed of Flowers. I need to know where they found the bright green velvet on that chair. |
Would you like to live in a colorful home? Do you have a fear of bright colors? I know some people do. They're not always easy to get right but if you're successful the result is truly beautiful!
On another note I have big news: This weekend I FINALLY got my kitchen floor down! WOOT!!! Well, almost, I have a few final pieces to put down and then I have to clean things up and then I can show you some before and after pictures. However, I'm slacking off a little today. While installing the floor Roger and I discovered that we are old so I'm pretty achy at the moment. Apparently I have heretofore undiscovered flooring muscles that are rather angry with me. But pain or no pain I LOVE my new floor and I can't wait to show you!
I shall see you tomorrow,
H
Monday, June 18, 2012
Double Book Review - Sania Pell
Hiya,
As I've mentioned, I'm trying to finish Lucie's room so I can check one space off my list. I hate to say it but I didn't make much progress this weekend for two reasons. One, is that the room has been occupied for a few days by a steady stream of Lu's friends and two, we went to Kennebunkport for Father's Day. Needless to say, we didn't do too much on the house this weekend.
As the room is still occupied and will continue to be occupied until Wednesday, I'm switching to some of the other projects that I want to finish for her space. I'm hoping that I can do these "under the radar" because I don't want "help" on these, if you catch my drift ;-)
Here's where Sania Pell's two FABULOUS books The Homemade Home and The Homemade Home for Children. come in. I have five to six projects that I am doing/have done from these books. That, my dears, is a record!
These books are great because the projects are beautiful, clever, actually doable with materials that you can actually find, and are easy to adapt to your color-scheme or taste. It's really rare to find all of these things in one book (or two books, as the case may be). I can't tell you how often I find craft books filled with projects that are easy with easy-to-find materials but are ugly "Crafting with trash, turn your used toilet-paper tubes into a lampshade?... Um, no thanks" or beautiful but impossible to source. "Where in heaven's name am I going to find pink yak's teeth?" or impossible to make "If I start knitting now, maybe I can finish this car-cover knit with thread before 2020." It's a rare book that has lots of lovely, make-able projects and Sania pulled it off twice!
The first of the five-ish projects is this linen bulletin board from The Homemade Home. I love how simple, natural and useful it is. The instructions for all of the projects are clearly written and easy to follow. Sania makes suggestions for things that can enhance the project that you can use or not, like spray-painting those clips. I'm going to leave them silver but I can see where a color would be pretty.
She has a couple of projects using paper clay. I'll be making this butterfly garland from The Homemade Home for Children for Lu's room too. I happen to have butterfly cookie cutters but they are pretty easy to find. Now that I've used the paper clay I'm sold. It's easy to sculpt and it air-dries. I love the shades of gray she uses.
Many of the projects serve as an inspiration to create your own version. I LOVE the paper-clay tags but I decided to use strips of Lu's fabric for the ties and to blind emboss the words with alphabet stamps. Sania makes suggestions for variations on the projects, like using ink or adding buttons. She gives you permission to make the project your own. That is really refreshing. Not that you need permission to make something your own, it's just that by making the different suggestions Sania reminds her readers that crafting is a creative act for the individual. There isn't a "right" way.

Some of the projects are impossibly simple and clever like this one from Homemade Home for Children. I would never have thought to make a blackboard from an artist's palette! This is fantastic! Wooden artist's palettes are inexpensive and their shape is lovely (although I've had one child walking around with it next to her face saying "Look! I'm Pacman!" I also found this cool German colored chalk from Bell'occhio that I'm going to grab for her to go with it. Shopping for the stuff to go with the stuff you're making can be one of the downsides of crafting.

I have two chairs that I'm planning on quirkifying (I just made that word up) like this one from Homemade Home. Lu's antique Victorian chair that I've already painted turquoise is going to get that green ball-fringe as well as a new seat from that fabric. It's going to be cool. As you can see, Sania has large projects as well as the small, simple ones. However, even this chair doesn't seem daunting to attempt, it just seems fun. It's nice not to be scared of a craft.... you know what I mean, that it's going to be too hard to make, not actually scary, geez.
If you like crafting and you're looking for books with lots of lovely projects that you can actually make, I can't recommend these enough. The projects are both great and inspiring, the instructions are easy to follow, and the photography is beautiful. Sania also includes patterns for the projects in the back. I've just shown you a teeny, tiny sample of what's in there. She has TONS of projects in these books. They range from easy, do it in an hour, to more difficult but still eminently doable. I LOVE these books and I hope she writes more!
I hope to share some of the finished projects with you this week.
I'll see you tomorrow!
H
As I've mentioned, I'm trying to finish Lucie's room so I can check one space off my list. I hate to say it but I didn't make much progress this weekend for two reasons. One, is that the room has been occupied for a few days by a steady stream of Lu's friends and two, we went to Kennebunkport for Father's Day. Needless to say, we didn't do too much on the house this weekend.
As the room is still occupied and will continue to be occupied until Wednesday, I'm switching to some of the other projects that I want to finish for her space. I'm hoping that I can do these "under the radar" because I don't want "help" on these, if you catch my drift ;-)
Here's where Sania Pell's two FABULOUS books The Homemade Home and The Homemade Home for Children. come in. I have five to six projects that I am doing/have done from these books. That, my dears, is a record!
 |
| My copies of The Homemade Home & The Homemade Home for Children along with the stuff to make a whole bunch of projects. |
These books are great because the projects are beautiful, clever, actually doable with materials that you can actually find, and are easy to adapt to your color-scheme or taste. It's really rare to find all of these things in one book (or two books, as the case may be). I can't tell you how often I find craft books filled with projects that are easy with easy-to-find materials but are ugly "Crafting with trash, turn your used toilet-paper tubes into a lampshade?... Um, no thanks" or beautiful but impossible to source. "Where in heaven's name am I going to find pink yak's teeth?" or impossible to make "If I start knitting now, maybe I can finish this car-cover knit with thread before 2020." It's a rare book that has lots of lovely, make-able projects and Sania pulled it off twice!
 |
| I'm using that linen/cotton blend from Purl Soho for her bulletin board. |
The first of the five-ish projects is this linen bulletin board from The Homemade Home. I love how simple, natural and useful it is. The instructions for all of the projects are clearly written and easy to follow. Sania makes suggestions for things that can enhance the project that you can use or not, like spray-painting those clips. I'm going to leave them silver but I can see where a color would be pretty.
 |
| Those are old Martha Stewart cookie cutters from waaay back when she did Martha by Mail. I loved that catalog. |
 |
| My version of the storage jar labels from The Homemade Home. Sania's are better... |
Some of the projects are impossibly simple and clever like this one from Homemade Home for Children. I would never have thought to make a blackboard from an artist's palette! This is fantastic! Wooden artist's palettes are inexpensive and their shape is lovely (although I've had one child walking around with it next to her face saying "Look! I'm Pacman!" I also found this cool German colored chalk from Bell'occhio that I'm going to grab for her to go with it. Shopping for the stuff to go with the stuff you're making can be one of the downsides of crafting.
I have two chairs that I'm planning on quirkifying (I just made that word up) like this one from Homemade Home. Lu's antique Victorian chair that I've already painted turquoise is going to get that green ball-fringe as well as a new seat from that fabric. It's going to be cool. As you can see, Sania has large projects as well as the small, simple ones. However, even this chair doesn't seem daunting to attempt, it just seems fun. It's nice not to be scared of a craft.... you know what I mean, that it's going to be too hard to make, not actually scary, geez.
 |
| I love this project from Homemade Home for Children. So pretty. |
If you like crafting and you're looking for books with lots of lovely projects that you can actually make, I can't recommend these enough. The projects are both great and inspiring, the instructions are easy to follow, and the photography is beautiful. Sania also includes patterns for the projects in the back. I've just shown you a teeny, tiny sample of what's in there. She has TONS of projects in these books. They range from easy, do it in an hour, to more difficult but still eminently doable. I LOVE these books and I hope she writes more!
I hope to share some of the finished projects with you this week.
I'll see you tomorrow!
H
Wednesday, May 16, 2012
The Fireplace Project
One of the other projects that we decided to start was the fireplace project. We really enjoy starting projects, we start them all the time. Finishing them is a completely different matter but I'm not going there right now.
Here is the fireplace last week, before we started this project.

The fireplace dominates our tiny 12' x 15' living room.

It's absolutely huge!

The hearth stretches from one side of the room to the other... Yes, I know I missed a spot... leave me alone.

It sticks two feet out into the room. With this foolish thing, our living room is 13' x 11." SO tiny...
So about a year ago, I decided to hack off the sides of the fireplace to make room for bookcases. I hate to lose an entire wall to a 1970's era fireplace.


So Kerry, our carpenter, came over and we rented a masonry saw. He cut off the sides and stuck them in the dumpster. All of the brick from the new cuts to the wall on either side is coming out. I only cleaned half of the hearth and stove for this pic so you can see how much brick dust there was. It was EVERYWHERE!
Obviously.

I've mentioned in the past, that as we are remodeling the house, we spend a lot of time asking "Why?" The fireplace was no different. When we took part of it down we saw that there is a huge space between the firebox and the outside wall of the chimney and it was filled with rubble... "Why?" Maybe it's for storing treasure? Roger suggested a "Cask of Amontillado" scenario but that's slightly disturbing...

We also discovered daylight coming in from both sides of the chimney. Doesn't everyone see daylight through their chimney?

Yep, you can see trees through that crack.We never actually wondered why the living room didn't hold the heat, we always knew something was up, this just confirmed it.
Last year our carbon monoxide detector went off. When the fire department arrived (after I asked them not to come, this is the second time that happened but that's a story for another day) they said that they couldn't see daylight through the flue, and why would you? After all you can see daylight through the crack in the wall, that should count for something, right? Yeah.
Anyway, when we opened the other side of the fireplace, we saw this:

That's right, that's the other flue. It looks like it belongs in a Tim Burton movie. Yes, Jack Skellington called and he wants his chimney back. It would probably be fine for him, since he's already dead and can't be killed by carbon monoxide.
I have it on good authority, AKA Dan the South Gardiner Postmaster, who knows everything that's going on in town... Have you ever stopped to think about how much your mail person knows about you? Well now you will. Any-hoo, Dan mentioned that the chimney was falling off the side of the house at one point in time and the guy who built it had to stick it back onto the house. Yep, good to know.
My dad suggested that we clean the flue by tying a couple of ten-pound weights to a rope and dropping it down... I'm taking that under advisement.
The next "why" came when we removed the sides and saw this:

I know you can't really tell what that is so I'll tell you. That is the space between the brick above the fire box and the wall, which means..... wait for it.....

It's barely attached to the ceiling. I kind of want to take the maul to it and smash it down with one fell swoop, but Hun has suggested that action might be more destructive than anticipated.
The upside to that discovery (yes there is an upside) is that we'll be able to put a pretty mantle over it. Eventually we want to put a fireplace insert in there so it will heat the house and function like a real fireplace.
Here is the quick and dirty sketch of what I want the bookcases to look like:

Fancy huh? I'm thinking of doing semi-built-ins using IKEA Billy bookcases fitted with crown molding. It'll be pretty when we're finished... in ten years or so.
I have one more started project to show you this week. We've torn out the bathroom... We've been busy.
See you soon,
H
Friday, April 27, 2012
Variations on a Theme - Rainbows

Hey Everyone!
I've been going rainbow crazy on Pinterest. I can't help it! Every time I think about decorating my home with a sophisticated palette I run into pictures like these and I start to change my mind. The problem is that it's extraordinarily difficult to decorate with the whole color-wheel without it crossing the line into clownish. I don't want a clownish house but it's so tempting to give it a try anyway! These wonderful pictures inspire me... or maybe conspire with me to do a rainbow take-over of my entire house. Believe me, I'm thinking about it.

 |
Clockwise from top left: A super-cute way to organize embroidery floss from Heather J's Life. Stairs from La Belette Rose, these really make me wish I had non-basement stairs. Cute tights - source unknown. A sweet doormat project from Lowes Creative Ideas. Rings in a rainbow of boxes - source unknown... Is it weird that I want those boxes more than the rings? Lovely poster by Conxy Jiménez (I love this). And rainbow twist ice cream - source unknown. There are a lot of photos with unknown sources on Pinterest. If you do know where any of these things are from, do tell!

From top left: A quirky color corner from Happy Mundane. DOTS! from Fieldborg. A know that Anthropologie no longer sells (boo). The new Saguaro Hotel in Palm Springs. A pie plate that Anthropologie no longer sells (again, boo) Super-cute button push-pins Present and Correct. A FABULOUS idea for paint chips! I love this!
My board with all of the rainbows is here and it's called Color Wheel. It's getting bigger every day! I guess I'm not the only person who loves the rainbow.
What do you think about decorating with the rainbow? Would you ever do something that bold?
Wednesday, March 21, 2012
More Mom-Art for Lu's Room... Maaaaaybe......
Hiya!
It should be noted that I spent many months deluding myself into thinking that I was going to finish this picture. However, recently I've had a discussion with myself where I finally admitted that I wasn't going to do that. I have therefore declared it "finished enough" and I've stuck it in a frame for her wall.

There it is, the rose floating in nothingness.

There it is closer. I need to draw more than once every three years. I forget that I like it.
My 40 x 40 has "Teach myself watercolor painting" as item number 4 on the list. So I've begun to fiddle with that medium... My success is, meh. But as Burt from Mary Poppins would say they're "better than a finger in the eye." and so they are. They are not art yet but they aren't stick figures either, not that there's anything wrong with stick figures.

My first watercolor attempt: a morning glory and a fuchsia. You will notice a theme in my artwork.

My next attempt: violets. These are bad and are destined for the circular file. Even the photo is blurry, the camera knows it's bad too.
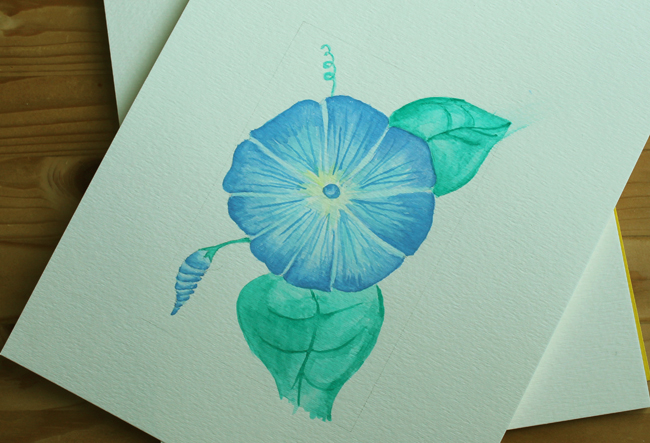
Third try: morning glory take 2. I think this is OK but I obviously have a lot more work to do.
I will say that it's fun to fiddle with the paints. I can tell that this is post recession because I got really cheap paints and brushes. In the past I would have purchased nice ones but I want to see if I like the medium before I spend any money.
Lu wants the last one for her wall. I'm not sure that I want it on a wall, maybe my fifth or sixth attempt will be wall-worthy.
On another note, my kidney is talking to me again. I knew I wasn't out of the woods but I had hoped it would wait a little longer. It's not bad but it makes me grumpy. My friend got me out of the house on a short walk today, so that was nice. Anyhoo - excuse any grumpy tone to the posts. It's me, not you ;-)
I shall see you tomorrow!
H
Tuesday, March 20, 2012
We're Closing in on Lu's Room!
It's VERY exciting!
This will be the first completely finished room in my house and I can't wait! Yesterday Kerry Pepin, our new handyman, finished the last of the woodwork. Now it just needs to be caulked and painted. The sewing projects are almost there, I'm nearly finished organizing it, I'd say... two weeks maximum and it will be fini!
However I'm SO excited about my progress that I have to share some of the finished projects with you.
1. The Reading Nook Cushion.

My mom made this at while we were at her house back in February. It's in one of the coordinating fabrics and the cover zips off to be washed. It's pretty awesome to have a mum who sews and sews beautifully to boot!
2. The DONE Pouf!

It is no longer dumb but done! I finished it this weekend and I LOVE it. More importantly, Lu loves it. I made it from Amy Butler's Gumdrop pattern, which is a wonderful, easy to sew, pattern. For the record, it wasn't dumb because of the pattern, it was dumb because I didn't reinforce the seams. Great pattern - dumb implementation. (Note: Sew all of the seams at least twice, three times if kids are going to use it.)
3. Her Poster

The poster that I designed for her finally arrived. I made it in Illustrator and had it printed at Vista Print. It was inexpensive to print and, well, you can tell in person, but she likes it and I thought it was nice to be able to contribute some art to her walls. I also wanted a constant reminder about what pretty is during her teenage years.
4. The Patchwork Pillow

I threw this together with the fabric from the collection. I didn't use a pattern and you can tell because nothing is even or straight. The fact that I can't sew a straight line doesn't stop me from making stuff though. I just reserve the right to pinch anyone who mentions my inaccurate work ;-p
5. The Roman Shades

One of the places where I DO actually care if the seams are straight which is why my AWESOME mum sewed these for me back in February. This weekend I hand-sewed thirty little rings to the back, put all of the dowels, and threaded all of the cords. Not pictured are the mounting boards that I cut and painted. They're down in the dirty, nasty basement waiting for me to finish them. I didn't want to ruin the post with a nasty, dirty basement picture.
We are closing in! It's so exciting to have a room almost done. Two years ago there were nothing but studs, no walls, no flooring, nada. We tore out everything and now it's almost there. What a journey! We only have... the whole rest of the house to finish. (OK, I'm not going to think about that today.)
See you tomorrow!
H
This will be the first completely finished room in my house and I can't wait! Yesterday Kerry Pepin, our new handyman, finished the last of the woodwork. Now it just needs to be caulked and painted. The sewing projects are almost there, I'm nearly finished organizing it, I'd say... two weeks maximum and it will be fini!
However I'm SO excited about my progress that I have to share some of the finished projects with you.
1. The Reading Nook Cushion.
My mom made this at while we were at her house back in February. It's in one of the coordinating fabrics and the cover zips off to be washed. It's pretty awesome to have a mum who sews and sews beautifully to boot!
2. The DONE Pouf!
It is no longer dumb but done! I finished it this weekend and I LOVE it. More importantly, Lu loves it. I made it from Amy Butler's Gumdrop pattern, which is a wonderful, easy to sew, pattern. For the record, it wasn't dumb because of the pattern, it was dumb because I didn't reinforce the seams. Great pattern - dumb implementation. (Note: Sew all of the seams at least twice, three times if kids are going to use it.)
3. Her Poster
The poster that I designed for her finally arrived. I made it in Illustrator and had it printed at Vista Print. It was inexpensive to print and, well, you can tell in person, but she likes it and I thought it was nice to be able to contribute some art to her walls. I also wanted a constant reminder about what pretty is during her teenage years.
4. The Patchwork Pillow
I threw this together with the fabric from the collection. I didn't use a pattern and you can tell because nothing is even or straight. The fact that I can't sew a straight line doesn't stop me from making stuff though. I just reserve the right to pinch anyone who mentions my inaccurate work ;-p
5. The Roman Shades
One of the places where I DO actually care if the seams are straight which is why my AWESOME mum sewed these for me back in February. This weekend I hand-sewed thirty little rings to the back, put all of the dowels, and threaded all of the cords. Not pictured are the mounting boards that I cut and painted. They're down in the dirty, nasty basement waiting for me to finish them. I didn't want to ruin the post with a nasty, dirty basement picture.
We are closing in! It's so exciting to have a room almost done. Two years ago there were nothing but studs, no walls, no flooring, nada. We tore out everything and now it's almost there. What a journey! We only have... the whole rest of the house to finish. (OK, I'm not going to think about that today.)
See you tomorrow!
H
Wednesday, January 18, 2012
The Dumb Pouf
I LOVE doing projects twice. Makes my year I tell 'ya.
I'm working on Lu's room (I have been for a while). In this post I show you the design board and fabrics for her room. I love the fabrics and so I thought: what better way to display them than on a pouf made from Amy Butler's Gumdrop pillow pattern? I really like this pattern but I made two small mistakes: one - I didn't double sew the seams and two - I didn't stuff it enough. So, now I have to remedy those two problems... fun, fun.

I do love the fabrics.

It's slightly wonky from being played on.


There's the tear...

Here's the pattern.
So I have to gut it, re-sew it, stuff it again but with an extra bag or two of stuffing, and then close it up by hand, again... It'll be worth it though. It's the thing that ties her room together.
Tomorrow I thought I'd post the Lucie's room list. Everything I have to do to finish it. It's the room we're closest to finishing. It will be awesome to have one room done and have before and after pics to show you!
I'm working on Lu's room (I have been for a while). In this post I show you the design board and fabrics for her room. I love the fabrics and so I thought: what better way to display them than on a pouf made from Amy Butler's Gumdrop pillow pattern? I really like this pattern but I made two small mistakes: one - I didn't double sew the seams and two - I didn't stuff it enough. So, now I have to remedy those two problems... fun, fun.
It's slightly wonky from being played on.
There's the tear...
Here's the pattern.
So I have to gut it, re-sew it, stuff it again but with an extra bag or two of stuffing, and then close it up by hand, again... It'll be worth it though. It's the thing that ties her room together.
Tomorrow I thought I'd post the Lucie's room list. Everything I have to do to finish it. It's the room we're closest to finishing. It will be awesome to have one room done and have before and after pics to show you!
Sunday, December 4, 2011
Charmingly Distressed vs. Just Plain Beat Up
Hi All!
I have finished a project that I want to share with you. A few years ago, my parent's gave us their old, well-used kitchen table. Sometimes as an object ages, and is lovingly used, it develops a patina and a charm. You can imagine families gathering around an old table having happy meals or an author working on her next book on an old desk. When this happens to an object the term we use to describe it is "distressed." Some folks love this look so much that they attempt to re-create that aged, distressed look on new furniture, like the Norfolk Table from Pottery Barn shown here:
However, charmingly distressed is not a phenomenon which takes place in my house. Nope, when things get old at my house they just look beat up, like our kitchen table here:
It doesn't have charming nicks and dings, it has gouges right down the middle. It doesn't have a patina from age it has paint and ink and dirt ground in. There is absolutely nothing charming about this table. To make matters worse, once an item has started to look beat up, it is so much easier to make it worse. As evidenced by my sweet children...


I have finished a project that I want to share with you. A few years ago, my parent's gave us their old, well-used kitchen table. Sometimes as an object ages, and is lovingly used, it develops a patina and a charm. You can imagine families gathering around an old table having happy meals or an author working on her next book on an old desk. When this happens to an object the term we use to describe it is "distressed." Some folks love this look so much that they attempt to re-create that aged, distressed look on new furniture, like the Norfolk Table from Pottery Barn shown here:
 |
| The "charmingly distressed" Norfolk table available at Pottery Barn Photo from Pottery Barn |
 |
| a charming distress close-up |
 |
| It's outside, waiting to be sanded. |
 |
This is not charming. As much as I love my kid's artwork, I do not want it permanently engraved in my table with ball-point pen.
We had been planning to refinish the table for some time. What we didn't know was how much work it was going to be to get all of that crud off. Hun sanded that table-top for four hours with a palm sander! After which, I put four coats of clear-coat poly-acrylic on it. Then the top looked like this:
Now I'm pretty jazzed about how it's looking. We discussed sanding down the legs in order to finish them in the same way as the top, but that was nixed with the memory of four hours with the palm-sander. We decided to paint them instead. I chose a pretty blue-y-purple:
Ta-dah! Now I LOVE my table! Love, love, love it. We are very slowly making progress on the kitchen, but I feel like this is a huge leap forward! The table was such a colossal eye-sore that it brought the whole room down with it.
AND, if you look back at the picture of the finished top, you'll get an idea of what the floors, which will be replacing that ugly, 70's linoleum, will look like.
There you go! A finished project. Hallelujah!
See you tomorrow!
H
Subscribe to:
Posts (Atom)